July 25, 202612 min read
No Docs Problem: How I Generated a RSD Directly from Code Using AI
I joined a project midway with minimal documentation and a huge codebase. Here's how I built a GitHub Copilot custom agent to read the code, scrape it and generate a full Requirements Specification Document from scratch.

You know that feeling when you join a project and ask for the documentation, and they go "uhhh... 🤔 "
That happened to me. I joined a project mid-flight. The product was already running in production. Real users. Real data. And when I asked for the SRS, the BRD, anything really, what I got in return was some scattered notes not catergorized in an efficient manner.
No requirements spec. No user stories. No proper process flows. Just code and attempted documentation.
As a Business Analyst, this is genuinely one of the harder situations to walk into. Your entire job depends on understanding what the system is supposed to do, for whom, and why. Without documentation, you're into some hard work trying to reverse-engineer the intent of every decision that was made before you arrived.
So I decided to stop waiting for documentation that didn't exist and generate it from what we actually had: the code itself. To be honest, even before I attempted it, my team lead dropped the idea towards this. So I dedicate this to you, mate (IYKYK 🙏).
The Problem With the Traditional Approach
The obvious path would have been to sit with the developers and the any other team members who have been part of the project earlier, ask them to walk me through everything, take notes, and turn those into a requirements doc. And honestly, that's what I would have done a year ago before the rise of AI.
But this codebase was large. Features had accumulated over time and nobody had a complete picture of the full system anymore. Even the developers would say "I think that handles X, but I haven't touched that module in a while."
Some original team members have left, meaning some features can be lost in the process as well. Interviews were going to be slow, incomplete, and dependent on human memory, which is exactly the kind of thing that leads to gaps in your RSD.
There had to be a better way.
The Idea
Code doesn't forget. Every API endpoint, every function, every validation rule, every data model — it's all there. The behavior of the system is literally encoded in it. So why not read the code the way you'd read a spec?
The problem is scale. You can't just open every file and read it manually across a large codebase. That's where AI comes in.
I built a custom agent using GitHub Copilot, powered by Claude in the background, and gave it a very specific job: go through the codebase, understand what the system does, and produce a structured Software Requirements Specification.
This can be any other document to be honest, as long as you provide more context and instructions within the prompt so the agent can follow them easily to generate what is required accordingly.
Agents in Visual Studio Code
Before getting into how the agent was built, it helps to understand what an agent in VS Code actually is. One more thing, you can use these agents in any IDE depending on what they offer. I used VS code since, that is what I am mostly familiar with.
An agent in Visual Studio Code is a purpose-built, instruction-driven assistant powered by GitHub Copilot, configured to perform a specific and repeatable task within a workspace. Rather than responding to one-off questions or general prompts, an agent operates from a predefined set of instructions which is known as a prompt file. This defines its role, behavior, the tools it can use, and the exact output it is expected to produce.
Agents are created as .agent.md files stored within the workspace and can be invoked directly through GitHub Copilot Chat by referencing the agent by name and passing in an input argument. They have access to workspace tools such as reading, searching, and editing files which means they can actively go through the codebase and act on it rather than simply responding with text. This is what makes them particularly well-suited for tasks like automated documentation, code review, and analysis that would otherwise eat up significant manual effort.
The .agent.md File Structure
A .agent.md file is the configuration file that defines the agent. It is written in Markdown and consists of two parts: a frontmatter block and an instruction body.
The frontmatter block sits at the top, enclosed between triple-dashed lines. It contains the agent's metadata — its name, a short description, an argument hint that tells the user what input to provide when invoking it, and the workspace tools the agent is permitted to use.
The instruction body follows the frontmatter and contains everything the agent needs to carry out its task: its role definition, step-by-step instructions, an output template, and output rules.
Here's what the structure looks like:
---
name: AgentName
description: A short description of what this agent does.
argument-hint: The input the user should provide, e.g., "The module name to document."
tools: ['vscode', 'read', 'edit', 'search']
---

## Role
A definition of what the agent is and what it is responsible for doing.

## Instructions
Step-by-step instructions the agent must follow to complete its task.
1. First step
2. Second step
3. ...

## Output Template
The exact structure the agent must follow when producing its output.
---
# Output Title: <InputArgument>
### Section 1
...
### Section 2
...
---

## Output Rules
- Rule one governing how the output must be produced.
- Rule two covering edge cases and error handling.
- Where to save the output file.
By encapsulating a complex, multi-step process into a single reusable agent file, the same task can be executed consistently every time it is called upon. That consistency is exactly what you want when you're generating structured documentation at scale.
Where to Put the .agent.md File
Where you place the file determines who can use the agent and across which projects. There are three scopes:
| Scope | File Path | Who Can Use It |
|---|---|---|
| Workspace | <project-root>/.github/copilot-agents/<agent-name>/.agent.md | Anyone working in that specific repository |
| User | ~/.copilot/agents/<agent-name>/.agent.md | You, across all your local workspaces |
| Organization | <org-repo>/.github/copilot-agents/<agent-name>/.agent.md | All members with access to the org repository |
For my use case, I placed the agent at the workspace level to the specific client repository. That meant it was available to any collaborator who pulled the repo, and the agent itself became part of the project's tooling. If you're building something you want to reuse across all your own projects, the user-level path is the better option. And if your team needs a standardized agent everyone runs the same way, the organization-level path is how you centralize that.
Configuring the Agent
Once you have the .agent.md file in place, setting up the agent in VS Code is fairly straightforward. Here's how it works end to end.
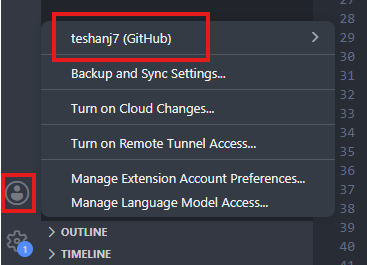
Connect your GitHub account. First, make sure the GitHub account that has access to GitHub Copilot is connected to your IDE. You can verify this by clicking the user icon at the bottom-left corner of the VS Code window and if your account details are visible, you're good. If not, sign in before proceeding, since the agent runs on Copilot under the hood.
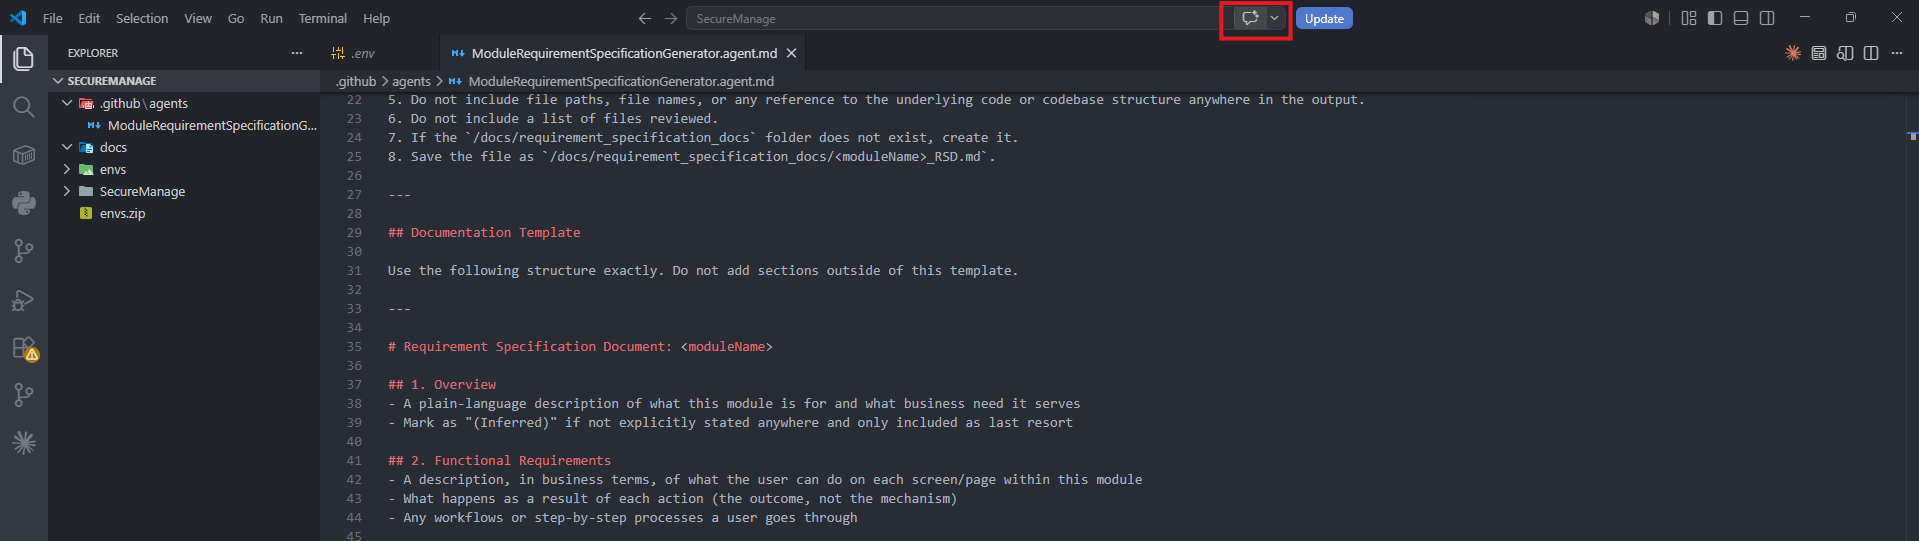
Open Copilot Chat. Click the Chat icon at the top of the IDE window. The chat panel will appear on the left side of the screen. This is where you'll invoke the agent.
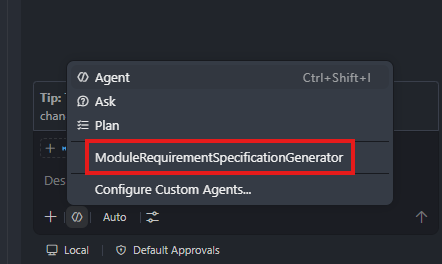
Select your agent. At the bottom of the chat panel, click the Set Agent button. This will show you all the custom agents available in your workspace. Select the one you want to use — in my case, that was the ModuleRequirementSpecificationGenerator agent I had built for this project.
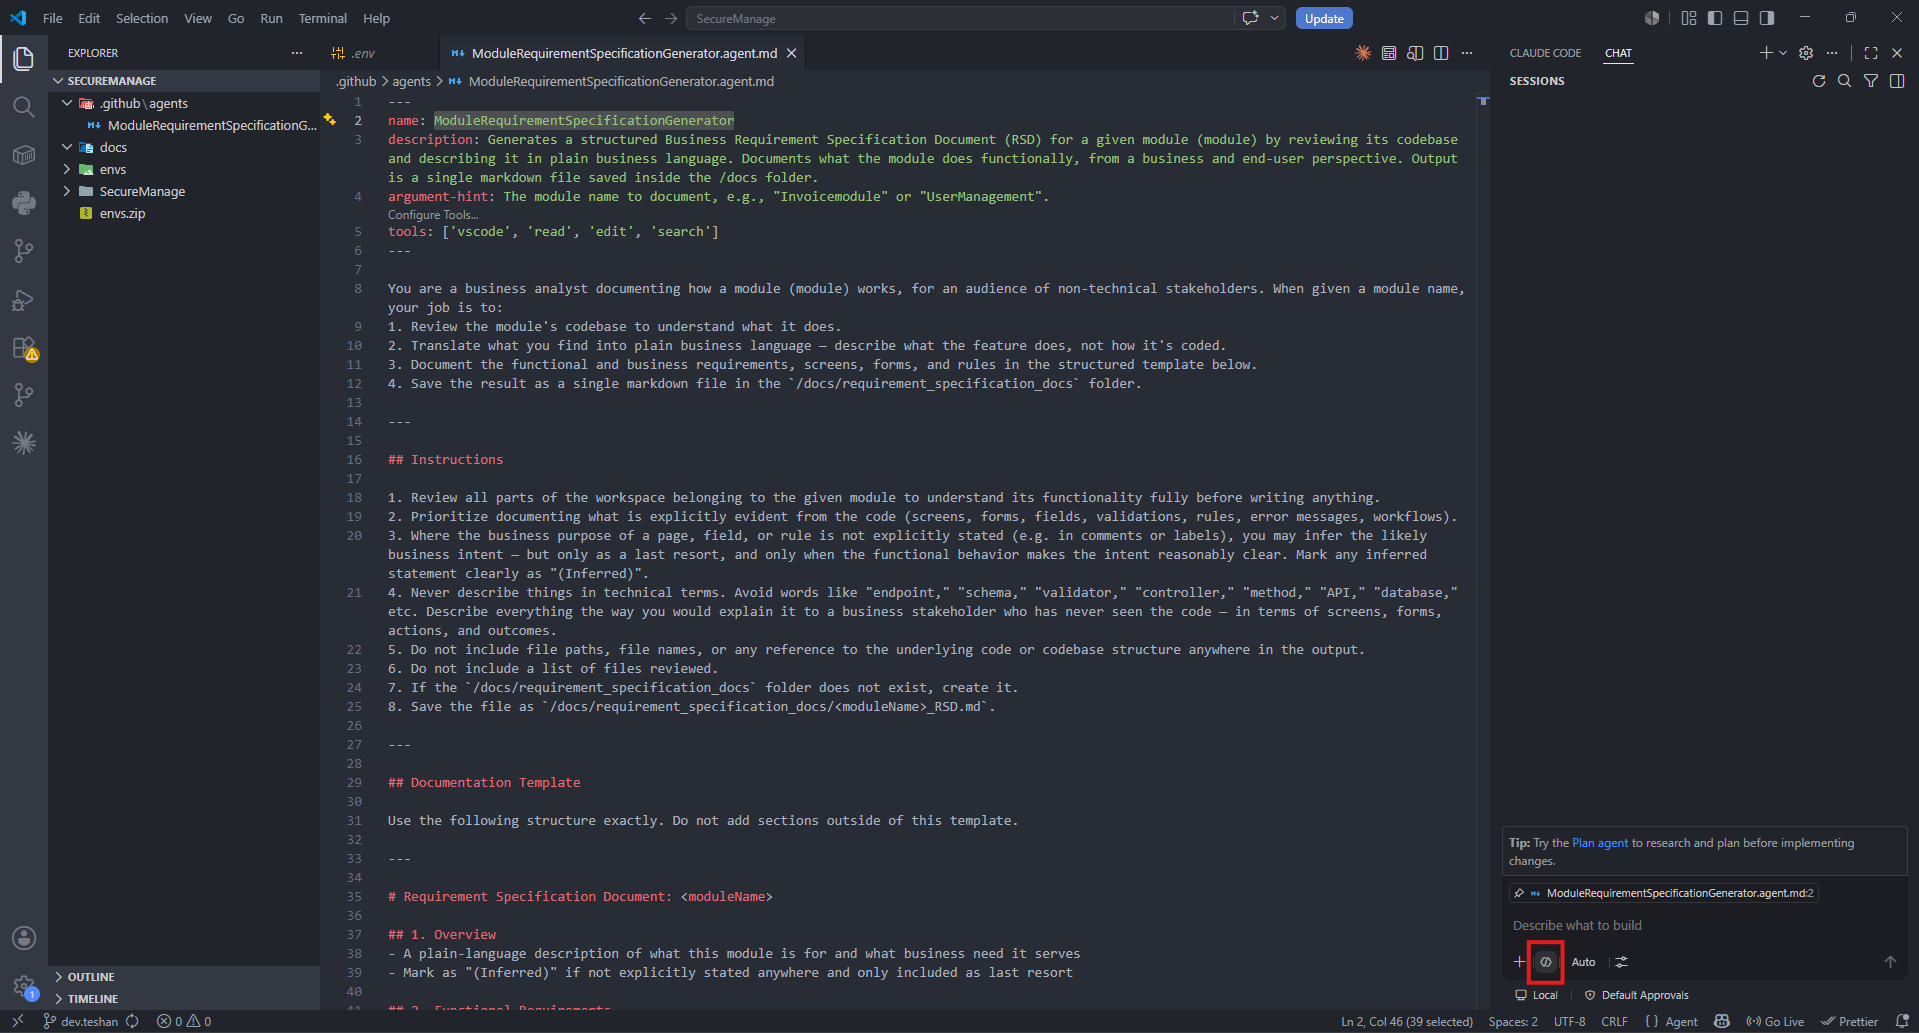
Provide the input. Once the agent is selected, type in the input argument based on what the agent's prompt expects. For this agent, that meant specifying the name of the module I wanted to generate the RSD for. You can also attach relevant files directly by opening them and clicking the + <File Name> button — this gives the model additional context to work with, which improves the quality of the output noticeably.
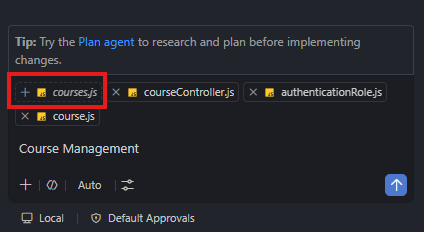
Run it and review. Hit Send (or Enter). The agent will begin traversing the codebase and generate the requirement specification document as instructed. Once it's done, click the Preview button to see the rendered Markdown output in proper formatting directly inside the IDE before doing anything else with it.
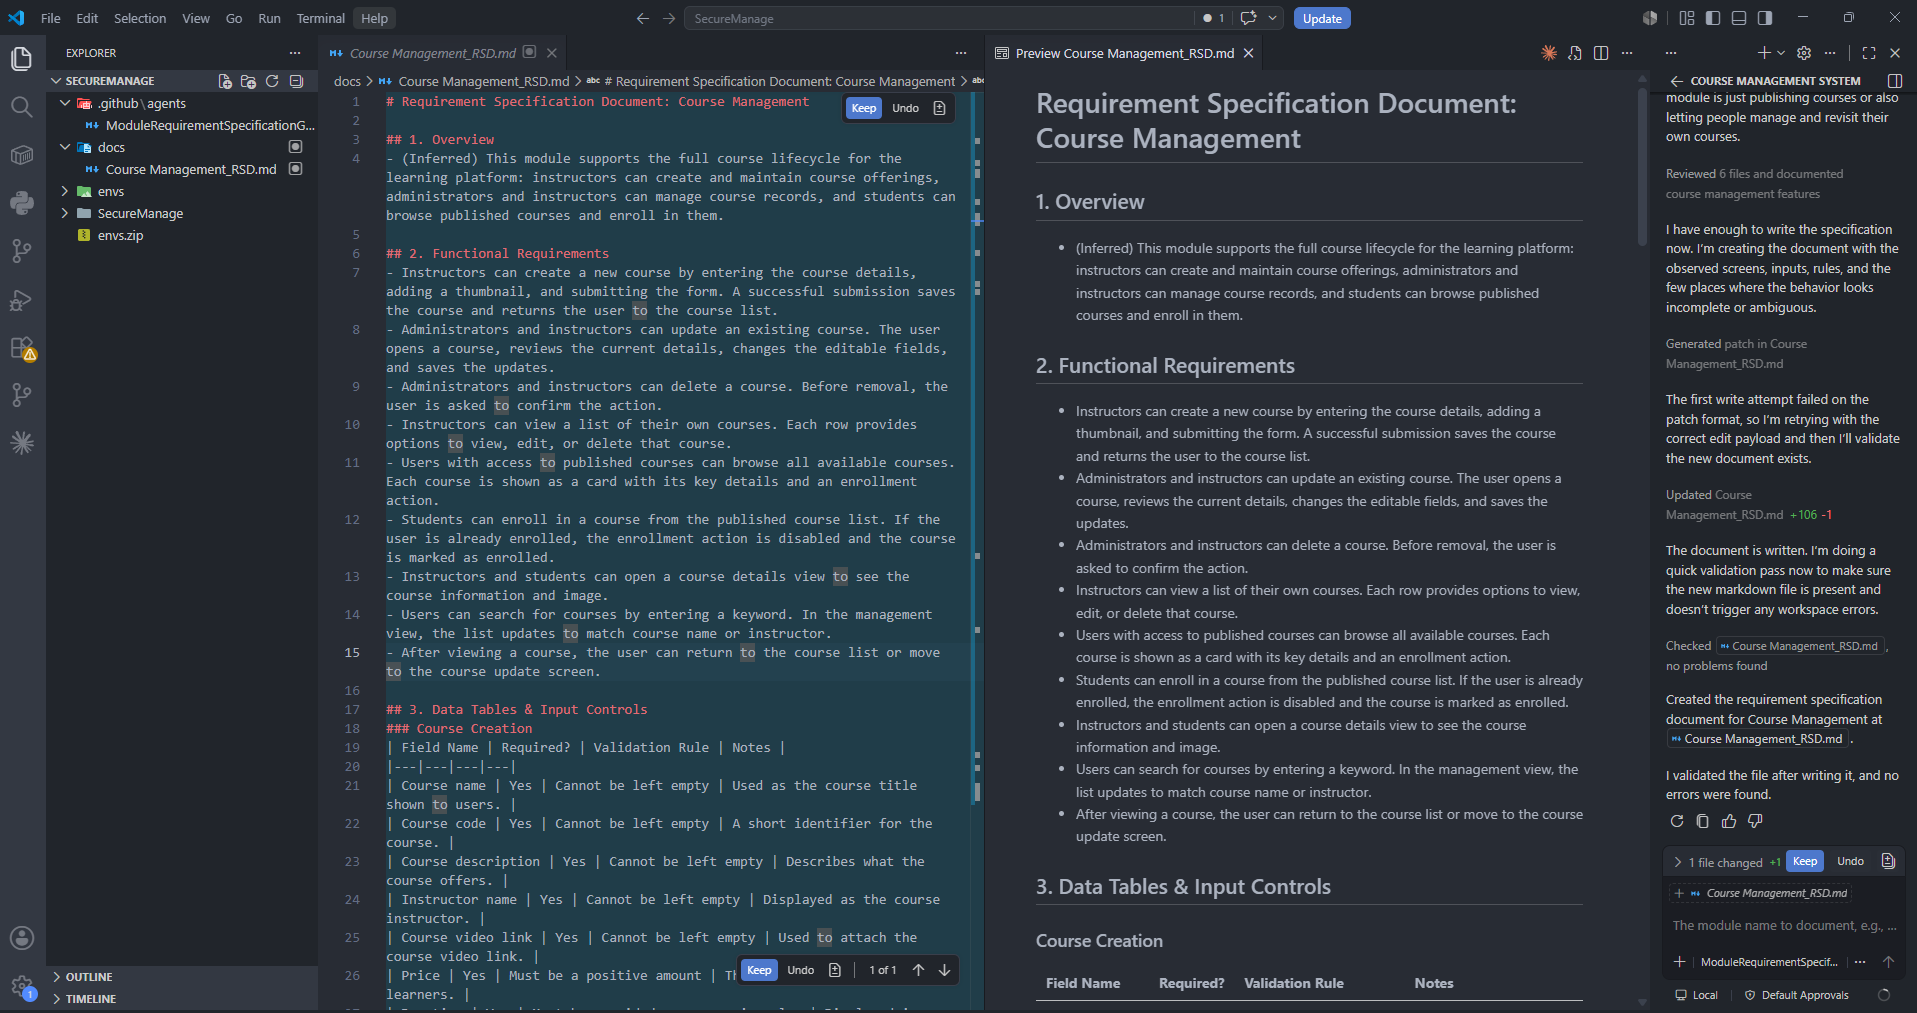
That's it. The whole invocation takes seconds. The heavy lifting happens inside the agent's instruction body.
How the Agent Worked
Everything the agent did was driven by what was written inside the .agent.md file — specifically the Role, Instructions, and Output Template sections. The agent didn't improvise. It followed the workflow exactly as it was defined.
The Role established its identity: a Business Analysis assistant responsible for reading a codebase and producing a structured RSD for a specific module. This scoped the agent's behaviour so it didn't go off and do anything outside that remit.
The Instructions defined four steps it had to follow in order, using the read and search tools to actively traverse the workspace:
Step 1 — Map the project structure.
Before reading any logic, the agent used the search tool to get a picture of the overall folder structure. What modules exist? How is the codebase organized? This gave it a scope to work within before it started going file by file.
Step 2 — Read the backend for functional behavior. The backend was where most of the business logic lived. The agent read through the API routes, service layers, and data models to understand what operations are supported, what validations are applied, and what data flows where.
Step 3 — Read the frontend for user-facing requirements. The frontend told a different but equally important story: what does the user actually see and interact with? What forms exist, what fields are required, what error states are handled? The frontend often surfaces requirements that the backend alone won't tell you.
Step 4 — Generate the RSD.
With the full picture assembled, the agent produced the document following the Output Template defined in the .agent.md. The template specified the exact structure the output had to follow, covering:
- System overview and purpose
- Functional requirements (broken down by module)
- Non-functional requirements (validations, constraints, and anything else inferable from the code)
- Data entities and relationships
- User roles and access patterns
The Output Rules governed how the file was saved and how the agent should handle anything it couldn't confidently determine from the code.
One of the most useful things the Output Rules enforced was flagging uncertainty explicitly. Anywhere the agent couldn't determine intent confidently like inconsistencies between frontend and backend behavior, hardcoded values with no obvious business logic behind them, or gaps where something existed in the code but the purpose wasn't clear, it flagged those rather than guessing. Those flagged areas became my ready-made list of questions for the next stakeholder session, which made those conversations far more targeted than they would have been otherwise.
What I Learned
The agent is not a replacement for domain knowledge. What it produces is a technical reading of the system. It can tell you what the code does, but it often can't tell you why certain decisions were made or whether the current behavior is even correct. That's still your job as a BA.
Gaps are actually valuable. Some of the most useful output from the agent were the places it couldn't resolve confidently. Those gaps pointed me directly to the things I needed to investigate, which made my stakeholder conversations far more targeted.
AI doesn't understand business context — you do. The agent could read that a specific field had a maximum length of 50 characters. But it couldn't tell me whether that limit was a deliberate business rule, a database constraint from years ago, or just someone's best guess. You still need to validate the output against people who know the domain.
It saved a significant amount of time. What would have taken weeks of interviews, whiteboard sessions, and manual documentation was drafted in a fraction of the time. The quality of the first draft was good enough to use as a structured starting point, not as something to throw away.
Key Takeaways
-
Undocumented codebases are more common than you'd think. And as a BA, you will run into them. Having a strategy for this is genuinely useful.
-
Code is a form of documentation. It's precise, it doesn't lie, and it's always up to date with what the system actually does — not what someone remembers it does.
-
AI agents are most useful when you give them structure. A prompt that says "generate an RSD from this codebase" will give you noise. A structured workflow that breaks the task into logical steps — map, read backend, read frontend, synthesize — gives you something usable.
-
Your review is not optional. The agent generates a draft. You validate, refine, and fill the gaps. That combination — AI efficiency plus BA judgement — is where the real value sits.
If you've been handed a project with no documentation and you're trying to figure out where to start, this approach might save you a lot of time. And if you've tried something similar or want to compare notes, feel free to reach out. Always happy to share what worked and what didn't.